
Hi y’all! I am thrilled to be guest-hosting for Auntie Lolo’s Crafts today. I am Lacey Camp, a life-long crafter, who has now become a blog and Pinterest addict! I hope you enjoy making this wreath with me. My friend, Margaret Hale, taught me how to do this years and years ago. I have since made these wreaths for every holiday!

Supplies: One 12” metal ring (I find mine at JoAnne’s or Hobby Lobby), 2 yards of fabric (see above) and a lot of raffia. Cut your fabric and raffia into app 1-1/2”x7” strips.


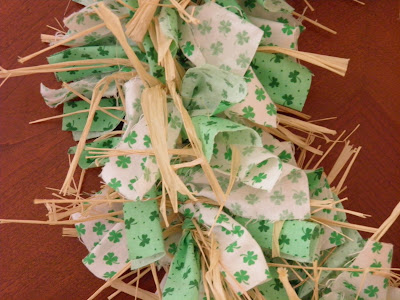
Next, begin tying your fabric pieces and raffia to the wire ring. There is no rhyme or reason to this. Just tie it tight one time. With two fabrics, I tie a strip of each color then I combine about 6 strands of raffia and tie it next and repeat for a long, long time. You might want to be watching something good on tv for this step!


You will need to keep tying until you cannot slide anything on your wire ring anymore. The fuller your wreath, the prettier, so push your fabric together in order to get as much onto your wire ring as possible! Your wreath is going to look “flat” until you are finished. Once you are done, you can start fluffing the entire thing by twisting and turning the fabric and raffia. I have given you an example here (finish your wreath first though as it will flatten out from you working on it again). I just wanted to give you hope as you are working! ;-)

When you are finished, turn your wreath over to create a way to hang it. I use shower curtain rings or old key rings on mine so I just attach them directly to the wire ring; however, you could easily tie something onto the back as well.


Don’t you love the finished product??? These are so light-weight and easy to store. They are also wonderful to ship as gifts.

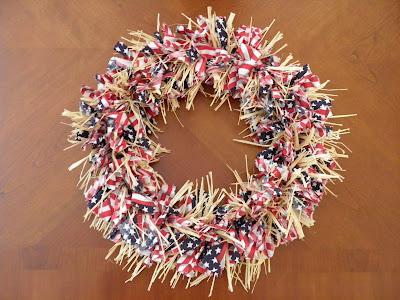
I have included other wreaths that I have made for other holidays so that you can see what this looks like when using only one material pattern, as in the Valentine and 4th of July wreaths below. These wreaths are beautiful done in one or many different patterns. I personally prefer using the raffia as it gives another element or dimension to the wreath; however, they are pretty without it. It’s up to you!

Thanks for reading today! Should you have any questions or comments, please leave them here and I will respond through Auntie Lolo. If you enjoyed this, you can come follow me on Pinterest at Lacey Camp - http://pinterest.com/laceydcamp/ or I would LOVE to see your creations on my Facebook page at Lacey Bushong Camp. Just send me a friend invitation and we’ll share ideas! I will be guest-hosting on Auntie Lolo’s Crafts again this month and hope you will join me then as well.


Great Post and pictures! Thanks.
ReplyDeleteLove it! I can't wait to try it out and the pictures very good.
ReplyDeleteThis wreath is so cute! I will have to try it out!
ReplyDeleteVery cute and simple idea. Don't they make colored raffia too? That would look adorable.
ReplyDeleteVery professional presentation and easy to follow, too!
ReplyDeleteSo cute. Can't wait to try it.
ReplyDeleteWhat a simple yet clever way to make a very nice looking wreath!
ReplyDeleteJust one of your many talents.
ReplyDelete