Showing posts with label ribbon. Show all posts

Monday, July 25, 2011

A-B-C Blocks

I sure have had baby crafts on the brain lately! So I took one of my favorite crafts to make, the 4x4 wood blocks that have been featured here, here, here, and here and made A-B-C Blocks for the baby's room.

Aren't they cute?! I love them!! The only thing I would do differently is use a wider solid brown ribbon but I was fresh out of those so I used what I had :)

I painted the blocks "Lemonade Slush" by Glidden and used brown vinyl for the letters because this is the main fabric in the baby's room...
Click HERE to see all the coordinating fabrics

The A-B-C blocks are made out of 4x4 pieces of wood. I can't wait to make more for baby gifts!

I am linking this project up to THESE fun parties!
post signature

Saturday, March 12, 2011

A Button Egg and Stuffed Bunnies!


I've been itching to make something for Spring! I've been obsessed with Bunnies since I was a little girl. I even had bunny wall paper :) When I saw THIS on Sandy's Creations, I knew I had to make one! The pattern is free! Because me and my sewing machine never get along, I hand stitched mine and it was super easy. But if you have a good relationship with your sewing machine, I would use it instead :)
I made the tall bunny and then decided he needed a friend, so I shrank the pattern and made a smaller one. They were all done and looking cute but they really needed something, so I added ribbon around their necks, and as you can see from the top photo they look much better!

While I was stitching the bunnies I had an idea to take some brown burlap I had and put some buttons on it in the shape of an egg. I took some photos along the way. Here they are....

Step One: I took a piece of cardboard and cut it so that it measures 5x7.

Step Two: I cut a scrap of burlap and taped it to the cardboard.

Step Three: I took some chalk and drew an egg on the burlap. Since eggs are a pretty simple, I free handed it but if you aren't comfortable with that, you could find an egg on clip art and then print it out and trace it.

Step Four: Dump out all the buttons you own :) Okay, maybe just the colors you need. Place the buttons on the chalk egg you just traced. It will take a little bit to figure out where the buttons fit best, kind of like a puzzle. It won't be perfect but just try and fill all the spaces in the best you can.

Step Five: Once you have all the buttons where you want them, take some super glue (this is what works best for me) and glue each button down starting on the outside and working in. Just a little tab is fine because you are going to stitch the buttons on once the glue dries.

Step Six: When all the buttons are glued down, stitch the buttons into place.

Step Seven: Hot glue the burlap to the cardboard and put in frame!

Please let me know if you have any questions! I hope you will make this for your house too!

Click HERE to see which link parties I am joining.


post signature


Tuesday, March 8, 2011

Happy Birthday Shauna!

It's my BFF Shauna's Birthday today! We have known each other 10 years, so crazy! We met at Ricks College and were roommates for 1 semester. We had oh so much fun!! Her birthday is today and here is what I made her....
It's a pink shirt (her favorite color) with an inside joke in brown writing. "Are you wearing your roommates clothes" is one of those stories that make us laugh every time! I wish I could have seen her face when she saw it.

Shauna is a teacher and I have been wanting to make her something for her desk for a while. You know I love those 4 inch blocks! I put a "K" on one side for her last name and an apple on the other in vinyl. I had some super cute ribbon from Hobby Lobby that I wrapped around it.

I hope she has a wonderful day!
post signature

Thursday, March 3, 2011

St. Patty's Day Wood Block

Can you tell I am loving these wood blocks that my Aunt and I cut? :) This is my 3rd project with them and I have already done another one that I will share next week.
This time I took pictures for you along the way!

 I downloaded the Shamrock image for free HERE
 and cut it out using SCAL on my Cricut.


HERE are the Linky Parties I will be joining!


Saturday, February 19, 2011

H Block

Remember THIS post? Well I made something else with all those blocks my Aunt and I cut.

I think it's such a fun little block! All I did was paint it brown and add an "H" with white vinyl. The ribbon is from Martha Stewart. I still have lots of those 4 inch blocks and I am working on coming up with more ideas for them! 

Click HERE to see which link parties I am joining.
post signature

Saturday, February 5, 2011

Quick Birthday Cards

I realized I had 2 birthdays the first week of February that I had forgotten about with all my laryngitis nonsense! I really didn't feel up to making cards though. What's a gal to do?
 This card was for my little 6 year old cousin, so the more glitter/sparkle the better right? I already had the zebra cut out and glued together thank goodness. I cut the glitter paper slightly smaller than the pre-made white card I was using. I bought a huge pack of white pre-made cards from Michael's for such an occasion (ok maybe not but it sounded good). I used Robyn's (aka My Pink Stamper) cheater method for the ribbon that you can learn how to do HERE. I stuck the zebra on and called it good! 

The second card is for a wonderful friend's birthday.
I already had the deer cut out and glued as well, so that's why I used it! Also I was looking for any opportunity to use the "Hello Dear" stamp I got from Michael's for $1.00. I took out  another pre-made card and some paper from Target's dollar spot.  I glued the cute little deer onto the card and tied a ribbon around it. Done and Done!

Oh and in case you were wondering, the Zebra was cut from the Cricut Cartridge "Create a Critter".
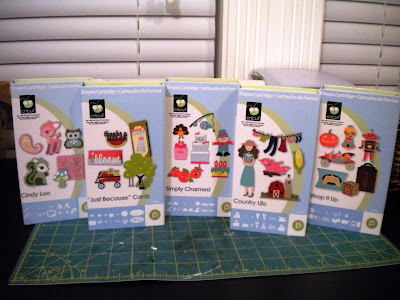
The deer was from the cartridge "Cindy Loo".
post signature

Friday, February 4, 2011

Valentine's Block

A few weeks ago my Aunt Tanis and I had a Craft Day. I recently introduced her to the world of craft blogs and her head almost exploded. She runs her own cake shop and makes AMAZING cakes! Just because I like to brag, go HERE to take a look.

Back to the point, On our Craft Day we made lots of fun wood blocks. Here is what I did with a few of them....

Recipe:

1. Cut a piece of 4x4 wood from the hardware store
 (approx. $10) into lots of 4 inch blocks.

2. Sand your blocks

3. Paint your blocks (we painted our several different colors)

4. Decorate! I added a pink vinyl heart and a ribbon (from Hobby Lobby)

It was really easy to make and a great inexpensive decoration for Valentine's Day! Come back next week to see what else I made with my wood blocks!

Please click HERE to see what parties I am linking this project up to!


Photobucket
post signature

Thursday, January 13, 2011

Valentine's Hedgehog Card

While looking at the submissions to the linky party on Someday Crafts I saw THIS and it inspired me to create this...


I am actually making several copies of this same card for all my nieces and nephews for Valentine's Day. My camera was not behaving so I'm not sure if you can really tell that the paper behind the hedgehog is a light pink.

Recipe:

Paper: I used my scraps so I'm not sure
Punch: Martha Stewart
Cartridge: Create a Critter, Heart is from George & Basic Shapes
Ribbon: Papertrey Ink
Size: 5x7 

Monday, January 10, 2011

Valentine's Day Vinyl GIVEAWAY


Tonight I replaced my Reindeers with these cute scalloped hearts. I used SCAL to design the wording and the heart was an svg that I downloaded for free HERE.
The ribbon is from Papertrey Ink.


GIVEAWAY!!! I cut out an extra 3 x 3 heart and "Be Mine" wording and will be giving one away! It's super easy to enter! 1)Become a follower if you aren't already and 2)Leave a comment on this post telling me what you love (or hate) about Valentine's Day. I will pick a winner on Saturday.
Good Luck!  

GIVEAWAY IS NOW CLOSED


Jewelry Holder


Joy Is At Home made this beautiful jewelry holder out of scraps she had laying around the house. I need this!
 Please visit her blog for the full tutorial!

Thursday, January 6, 2011

Reindeer Soap Dispenser

We had 3 sets of guests come over Christmas and New Years! I wanted to make sure our house was extra festive for them. Here is one of the things I did.....
I used SCAL and my Cricut to cut this cute little reindeer out. After that I just placed the vinyl on my soap dispenser and tied a festive ribbon around it. I actually made two, 1 for the guest bathroom and 1 for the kitchen.

Christmas Trees and Village


I follow a blog called, Bee in my Bonnet for a few reasons.
1) My BFF Lindsay designed the blog 2) The Quilts are AMAZING! I wasn't expecting to find the cutest Christmas Trees/Village I've ever seen on it though! Complete with a tutorial. I will be making these before next Christmas (Lindsay too). It looks fairly easy and is so very pretty!

Tuesday, December 7, 2010

Christmas Card Holder....

I found this idea in Martha Stewart Magazine and I made one as well, but it wasn't nearly as cute as this one turned out! Mine is just a plain hoop with plain clothes pins! But hey, it does it's job. I thought I would post a picture of this super cute version from A Diamond in the Stuff instead :)


Nativity Silhouettes


Aren't these gorgeous?! They were featured on Yay, I made it! And made by Make It and Love It. I have these silhouettes on SCAL and the frames, I must make these for Christmas!!  Thank you for sharing!


Wednesday, December 1, 2010

Cricut Cards

I love making cards with my Cricut! I took advantage of the black friday prices on cricut cartridges and got a few more. I have only bought one cartridge the whole time I have had my cricut (1 year) so I had 3 cartridges total (I got 2 when I got my Cricut). It was killing me not to buy more but I wanted to get a good deal! Here a picture of some cards I have made recently and my new cartridges!

*designed with SCAL for my Mom*
* "Just Because Cards" Cartridge*
* "Just Because Cards" Cartridge *
* I used my SCAL for the Star Wars card *
* "Zoobaloo" Cartridge *


Ribbon Holder

Remember this ribbon holder from Sassy Sites?
I asked my husband to make it for me for my birthday last week and he did! I put all my ribbon on it tonight and
I love it!! Thanks honey, good job!

Wednesday, November 3, 2010

Ribbon Organizer

Sassy Sites made the easiest ribbon organizer ever! (That's what she called it, and I agree!) I have been needing to find an inexpensize way to organize my ribbon and I've got it now, thanks! Please click HERE for the tutorial.
Oh and this only cost $2!
Related Posts Plugin for WordPress, Blogger...